Saturday, September 14, 2013

Học Objective-C với Java Swing


Hôm nay mình sẽ hướng dẫn các bạn từng bước làm quen với ngôn ngữ Objective-C thông qua ngôn ngữ Java (Swing) để mọi người có cách tiếp cận dễ dàng và trực quan nhất.

Dưới đây sẽ là từng bước để tạo ra một ứng dụng HelloWorld bằng: Java Swing (sử dụng NetBeans) và Objective-C (Iphone) (sử dụng XCode) :

Bước 1: Tạo một java application thông thường với tên gọi: HelloWorldJavaAndObjectiveC
Bước 2: Tạo một JFrame Form để kéo thả giao diện


Bước 3: Ở đây mình đặt tên là : "MainFrame" với Package có tên là : "helloworld"


Bước 4: Kéo thả một jLabel để hiện thị nội dung nào đó.


Bước 5: Đổi tên jLabel1 thành lblHelloWorld.


Bước 6: Ở menu Source | Design | History  ta chọn sang menu Source để làm như sau:

Tại hàm khởi tạo ta sẽ gán giá trị cho Label HelloWorld vừa rồi với nội dung là kiểu String : "Hello World"


Bước 7: Chạy app để hiện thị kết quả:


Bước 7: Chạy app để hiện thị kết quả:


Hello World trên XCode:

Bước 1: Tạo một ứng dụng thông thường, ở đây ta chọn Single View Application
Ấn Next để thực hiện bước tiếp theo:


Bước 2: Đặt tên chỗ Product Name là "HelloWorldJavaAndObjectiveC" 
Để mặc định check box: Use Automatic Reference Counting
Và ấn Next rồi ấn Create


Bước 3: Đây chính là file để mình làm giao diện cũng tương tự như JFrame ở swing ở trên


Bước 4: Ta cũng kéo thả 1 Label để hiện chữ Hello World.


Bước 5: Để tiện kéo thả, ta chọn tab "Show the Assistant editor" 


Bước 6: Click chuột phải vào Label và kéo thả ở phần "New Referencing Outlet" sang màn hình bên phải và đặt tên cho nó. Cách làm này sẽ liên kết Label ta kéo ở file "xib" với biến "lblHelloWorld" trong class ViewController.h


Bước 7: Ta mở file có tên: "ViewController.m" ra. Objective-C thông thường sẽ gợi ý cho ta nên tạo class với 2 file đó là file: h và file m. (Phần này mình sẽ đề cập sâu hơn ở phần sau.)
File "ViewController.m" sẽ là nơi ta viết code xử lý chính cho file giao diện "ViewController.xib"

Ở đây các bạn sẽ nhìn thấy một hàm có tên là:
- (void) viewDidLoad {
                [super viewDidLoad];

           }

hàm này cũng tương tự  như hàm khởi tạo của Java Swing trên.
Do đó ta sẽ làm tương tự như ở phần Java ở trên.
Từ khoá: self chính là this trong java. Do đó ai làm java chắc sẽ không quá khó để hiểu nó. ^^ 


Bước 8: Chạy app lên và xem kết quả.


Với ví dụ "hello world " này hy vọng đã giúp mọi người thấy được phần nào cách làm việc và phong cách code ở 2 ngôn ngữ. Cũng có nhiều khá nhiều khác lạ khi chuyển từ code java sang code objective-c bởi vì đó là cảm giác từ chính bản thân mình.

Sẽ bắt nhịp với nó nhanh thôi. :)

Cheer!


Tuesday, May 14, 2013

Config GData-objective-c-client to a Project


  1. Checking Out Sources
  2. Create Project to Test
  3. Add Source code GData to my Project
  4. Build Project and Copy Folder Headers
  5. Linking to the iPhone Static Library
  6. Removing Unneeded Code
  7. Config to Product/Archive


Checking Out Source

                Check out with link : http://gdata-objectivec-client.googlecode.com/svn/trunk/ 

Create Project To Test 

Copy Source code to my Project on folder:
              ex: GData

Add Source Code to Project.
              
    
Add a new target dependency:
             a.  Click your target -> Build Phases -> Target Dependencies -> the + button
             

             b. Choose GDataTouchStaticLib and click Add
             
             b.   Build Phases -> Link Binary With Libraries,  the + button 
                   add the libGDataTouchStaticLib.a
                   
             c. Also add the following frameworks at the same place, they are needed by GData.
    • SystemConfiguration.framework
    • Security.framework
    • libxml2.2.dylib
    • libz.1.2.5.dylib                   
            
           d. In Build Settings,  add the following entries under “Other Linker Flags”
               
          e. Also in Build Settings, set /usr/include/libxml2 under “Header Search Paths”
            
          f. Add some settings for Project GData
              Select GData.xcodeproj -> Select GDataTouchStaticLib - > Build Settings : type "Other C"
              Add to Debug and Release : 
                     -DGDATA_REQUIRE_SERVICE_INCLUDES=1
                     -DGDATA_INCLUDE_YOUTUBE_SERVICE=1


Build Project and Copy Folder Headers
          Build your project (⌘B). When build success.
         In your derived data directory, browse to Build/Products/Debug-iphonesimulator


        Copy Folder Headers to my Folder GData in Project and Add Files to ..                                                                


Removing Unneeded Code

However you build the library, it is worthwhile to remove code for the services that your application will not be using. To remove unneeded code, set these compile flags in the project or target build settings of the GData.xcodeproj project file. When compiling the sources directly into your application, set these flags in your project's settings.
The conditional flags in most source files of the library look something like this:
#if !GDATA_REQUIRE_SERVICE_INCLUDES || GDATA_INCLUDE_CONTACTS_SERVICE
So in either the project's settings for compile flags or in your project's config file, set GDATA_REQUIRE_SERVICE_INCLUDES to 1, along with the services you are using. For example,
Other C Flags: -DGDATA_REQUIRE_SERVICE_INCLUDES=1 -DGDATA_INCLUDE_CONTACTS_SERVICE=1
If your project compiles the OAuth 2 classes for authentication, also define the conditional -DGTM_INCLUDE_OAUTH2=1 in Other C Flags.
Do remember to set build settings so they apply to both Debug and Release configurations.
There is a conditional set in the static library target as a reminder to developers to define the needed services. For your project, replace or delete the definition
-DGDATA_INCLUDE_nameServiceHere_SERVICE=1
in the Other C Flags section of the static library target's Release configuration.

Config to Product/Archive


*Note: You can comment some code:
#if !DEBUG
  #if GDATA_INCLUDE_nameServiceHere_SERVICE && !GDATA_SUPPRESS_INCLUDE_WARNING
    #error The service placeholder compiler flag should be replaced by actual service specifications
  #endif
#endif

and 

Select GData.xcodeproj -> Select GDataTouchStaticLib - > Build Settings : type "skip" and change to Yes.


Ok done.
Good luck!


Wednesday, April 10, 2013

Cập nhật cách cấu hình Mongodb trên windows


Sau một thời gian sử dụng cách cấu hình này, hiện nay mongo đã có chút gì đó thay đổi dẫn đến hướng dẫn của mình có chút vấn đề.
Sau đây mình hướng dẫn lại mọi người cách cấu hình
1. Sử dụng: mongodb-win32-i386-2.4.1 (bản mới nhất 3/23/2013)

     2. Tạo file cấu hình: Lưu vào thư mục c:\mongodb\mongo.config (Chú ý phần đuôi mở rộng là .config)
##store data here
dbpath=c:\mongodb\data
 
##all output go here
logpath=c:\mongodb\log\mongo.log
 
##log read and write operations
diaglog=3

Đây là hình ảnh thử mục mongodb


3. Tiếp đến là bạn chạy đoạn lệnh sau
C:\mongodb-win32\bin\mongod.exe --dbpath c:\mongodb\data


  Sau khi chạy được như vậy là đã thành công rồi.
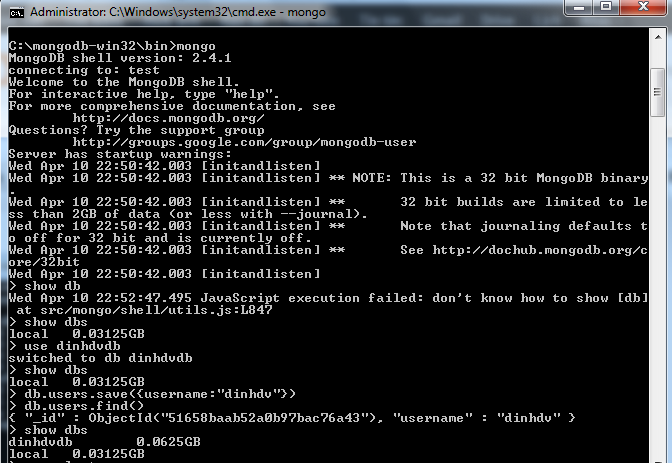
Bạn lại mở 1 cửa sổ cmd khác để kiểm tra kết quả nhé


Ngoài ra ta có thể viết 1 service để tiện cho mỗi lần ta chạy thì có thể làm theo cách sau:

c:\mongodb-win32\bin> mongod --config c:\mongodb\mongo.config --install

Sau khi chạy đoạn lệnh cmd kia ta vào Start của window và gõ : Services
Sẽ thấy được ngay kết quả ta làm. Ở đây ta có thể start và stop một cách dễ dàng.

Good luck!


Thursday, April 4, 2013

Hidden features of xcode

1. Switch to Header/Source File - (h/m)
2. Jump to Definition of a symbol
3.  Find Text in Documentation of a symbol. (Only works if you have they symbol's Doc Set installed.)
4. Open Quickly

5. Takes you to the beginning and end of a line.
6. Select the next auto-completion argument.
7. Select the previous auto-completion argument


8. Shows the auto completion pop-up list.
9. Quickly jump to a Group in the Groups and Files pane
10. Swipe three fingers left - Go back
11. Swipe three fingers right - Go forward
12. Show or hide right menu